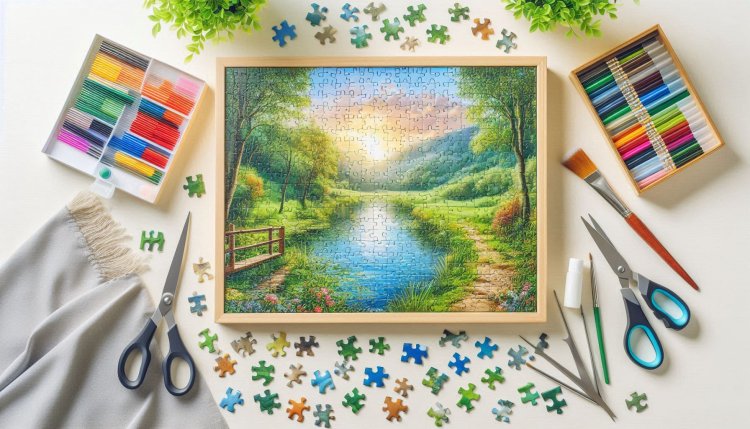
How to Frame a Jigsaw Puzzle: A Step-by-Step Guide to Preserve Your Masterpiece
Completing a jigsaw puzzle is a labor of love, often taking hours of patience and focus. Once finished, framing your puzzle transforms it into a lasting piece of art, perfect for home decor or sentimental display. This guide will walk you through how to frame a jigsaw puzzle like a pro, ensuring it stays intact and vibrant for years.


Introduction
Completing a jigsaw puzzle is a labor of love, often taking hours of patience and focus. Once finished, framing your puzzle transforms it into a lasting piece of art, perfect for home decor or sentimental display. This guide will walk you through how to frame a jigsaw puzzle like a pro, ensuring it stays intact and vibrant for years.
Why Frame a Jigsaw Puzzle?
Framing preserves your hard work, protects the puzzle from damage, and turns it into a conversation-starter. Whether it’s a scenic landscape, a favorite movie poster, or a custom family photo, framing adds a polished touch to your accomplishment.
Materials You’ll Need
Before starting, gather these essentials:
-
Puzzle glue or adhesive sheets
-
A rigid backing board (foam board, cardboard, or poster board)
-
A frame sized to fit your puzzle (standard or custom)
-
A ruler or measuring tape
-
A craft knife or scissors (for trimming)
-
Cleaning cloth (to remove dust)
-
Optional: UV-protective glass, matte board, or spacers
Step-by-Step Guide to Framing a Jigsaw Puzzle
1. Prepare the Puzzle
Ensure your puzzle is fully assembled on a flat, stable surface. Slide wax paper or parchment paper underneath to prevent sticking. Gently clean the surface with a dry cloth to remove dust or debris.
Pro Tip: Use a puzzle roll mat or transfer tool if you need to move the puzzle before framing.
2. Apply Adhesive
Securing the pieces is crucial. Choose between:
-
Puzzle Glue: Brush a thin, even layer over the front surface. Let it dry for 2–4 hours. Flip the puzzle and apply glue to the back for extra strength.
-
Adhesive Sheets: Peel and stick sheets directly onto the back of the puzzle for a mess-free option.
Avoid These Mistakes:
-
Don’t use too much glue, which can warp the puzzle.
-
Never skip the adhesive step—puzzles can crumble without it!
3. Mount on a Backing Board
Creative Touch: Add a matte board between the puzzle and frame for a gallery-style finish.
4. Let It Dry Completely
Allow the adhesive and backing to dry for at least 24 hours in a flat, dust-free area. This prevents warping or shifting.
5. Choose the Right Frame
-
Standard Frames: Measure your puzzle’s dimensions (e.g., 24"x36") and select a ready-made frame.
-
Custom Frames: Ideal for irregular sizes or 3D puzzles. Shadowbox frames add depth for layered designs.
-
Glass Options: UV-protective glass shields colors from fading, while acrylic is lightweight and shatterproof.
Budget Tip: Repurpose a thrifted frame by painting it to match your decor.
6. Assemble the Frame
-
Remove the frame’s backing and glass. Clean the glass to avoid smudges.
-
Place the mounted puzzle inside the frame, ensuring it’s centered.
-
Use frame clips or tabs to secure the backing. For added stability, apply framing points or small nails.
Warning: Avoid touching the puzzle’s surface with bare hands to prevent oils from transferring.
7. Secure and Hang
Attach hanging hardware to the frame’s back. Use a level to ensure it’s straight, then hang it in a dry area away from direct sunlight to prevent fading.
Tips for Success
-
Test Adhesives First: Try glue on a small section to check for discoloration.
-
Use Spacers: Prevent the puzzle from touching the glass to avoid condensation damage.
-

Common Mistakes to Avoid
-
Skipping the adhesive step, leading to loose pieces.
-
Choosing a frame that’s too tight or too loose (measure twice!).
-
Hanging in humid areas, which can warp the backing.
Conclusion
Framing a jigsaw puzzle is a rewarding DIY project that celebrates your dedication. With the right tools and techniques, you can turn any puzzle into a stunning display. Ready to show off your work? Follow this guide to frame your masterpiece like a pro—and let your accomplishment shine!
SEO Keywords Used:
-
how to frame jigsaw puzzle
-
preserve jigsaw puzzle
-
puzzle glue
-
DIY framing
-
UV-protective glass
-
mounting a puzzle
-
shadowbox frames
By integrating these steps and tips, your framed puzzle will not only look professional but also stand the test of time. Happy framing!
What's Your Reaction?